Manage FortiVoice IP networking
The virtualization environment uses port1 on each virtual device as a dedicated management interface to access services such as HTTPS and SSH. Therefore, use port2 to connect FortiVoice Enterprise to the virtual lab network and carry lab traffic.
Using the FortiVoice web administration page, select System and Network on the left-hand menu and select the Network tab.
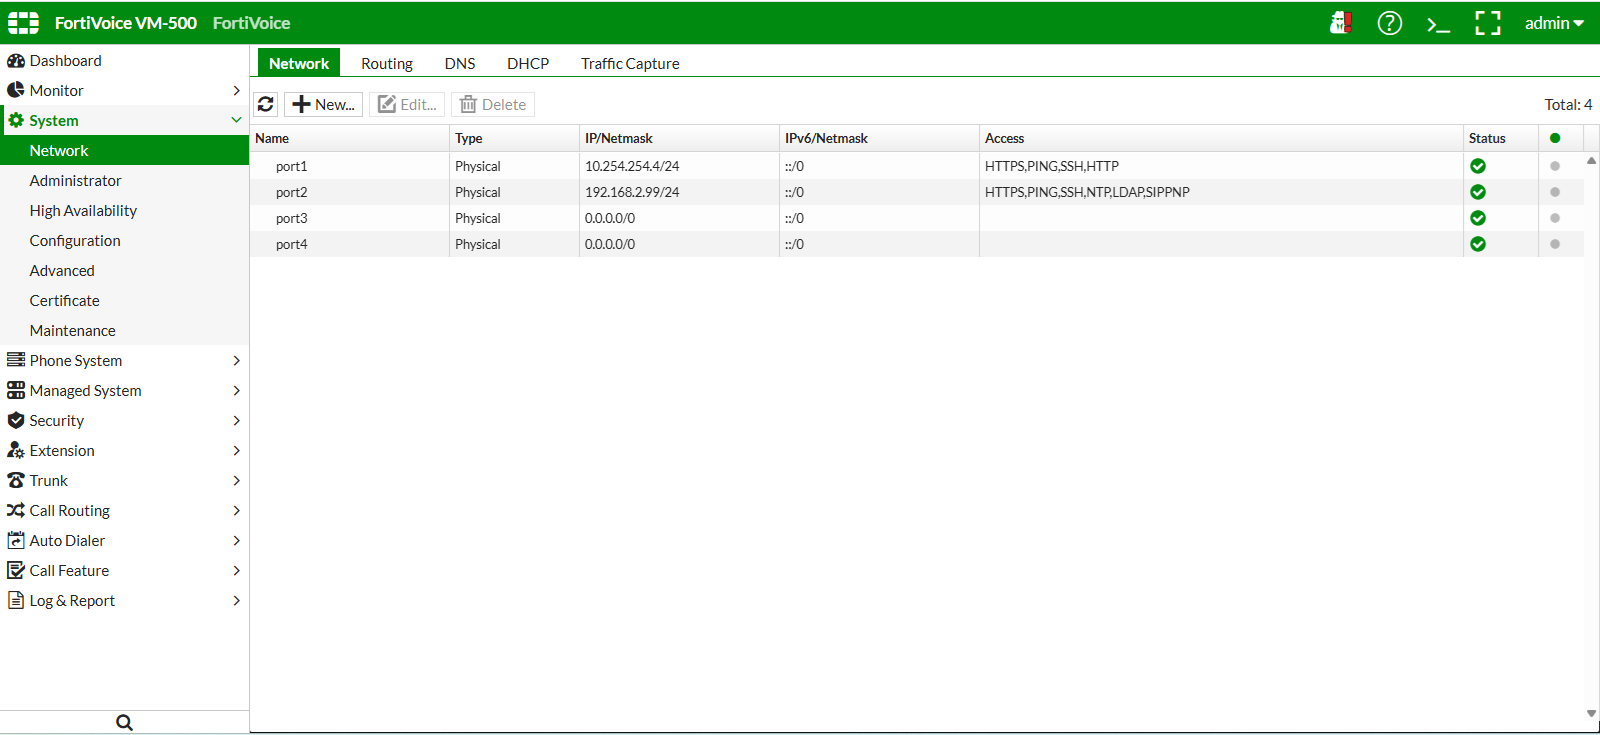
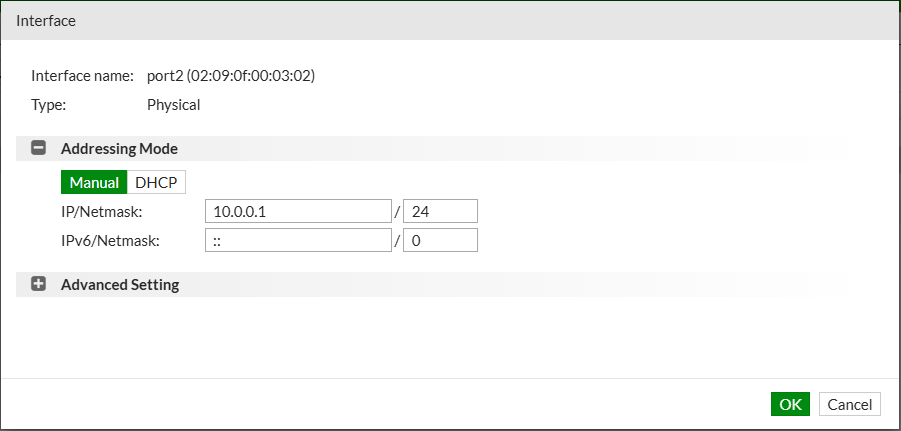
Select port2 and click the Edit button.

Set the FortiVoice IP address to 10.0.0.1 and click the OK button.
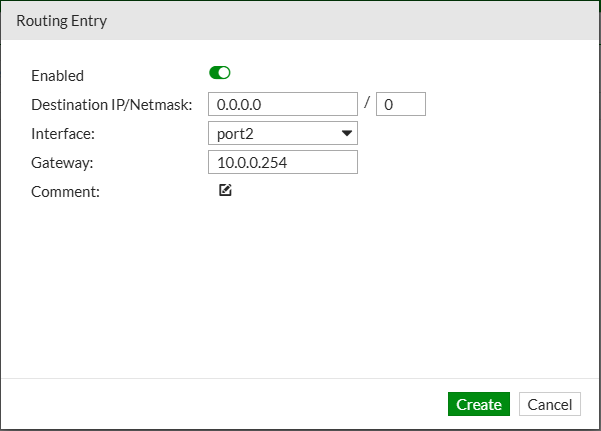
Select the Routing tab to manage the default gateway for the FortiVoice and click the New button.

Set the default gateway to 10.0.0.254 and select port2 for the interface, then click the OK button.
Verify FortiVoice local and external network connectivity by using the FortiVoice console.
Open the FortiVoice web CLI console by clicking on the >_ button on the upper-right of the web page.
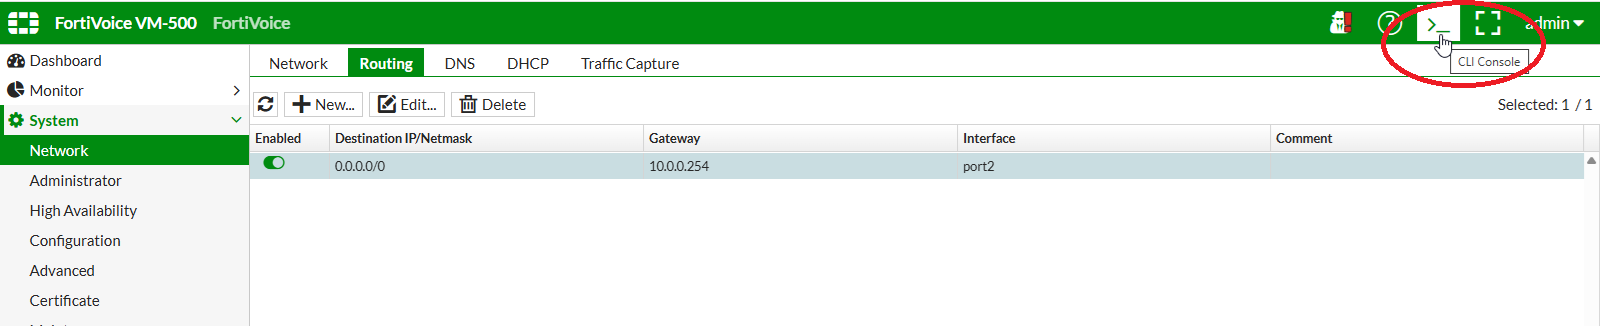
Enter the following commands:
execute ping 172.25.26.254execute ping 8.8.8.8
Both commands should complete without packet loss. If either test fails, verify the port2 IP address, default route, and lab connectivity before continuing.
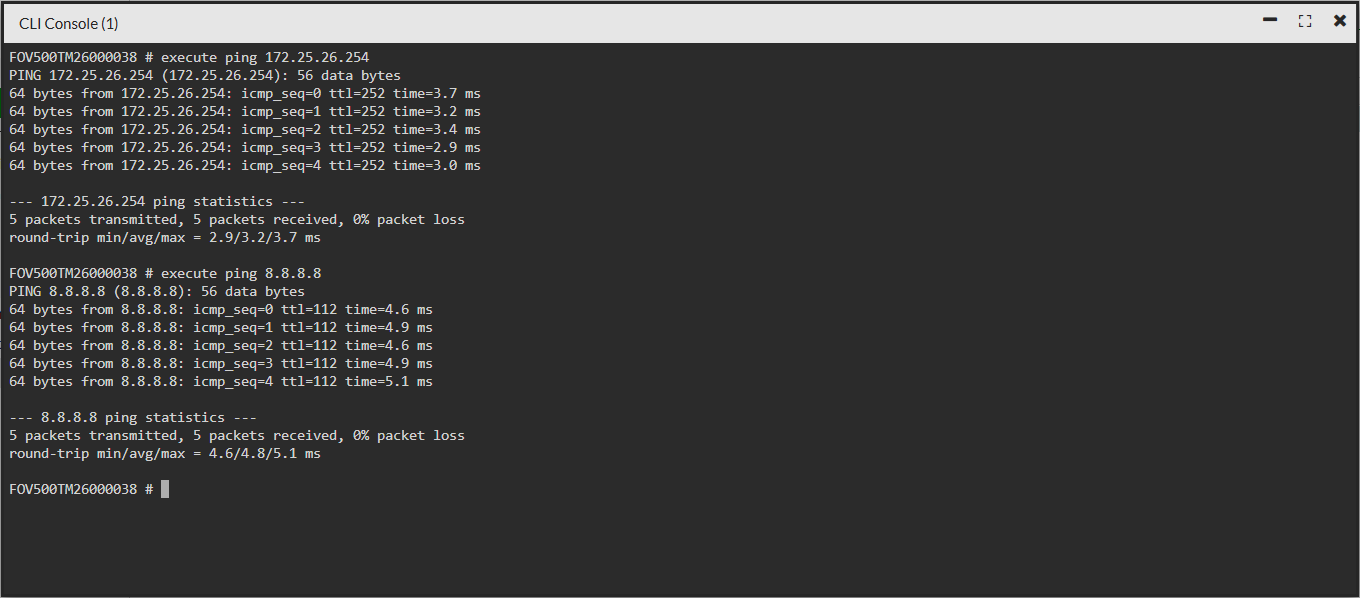
You can close the web CLI console for the next steps.
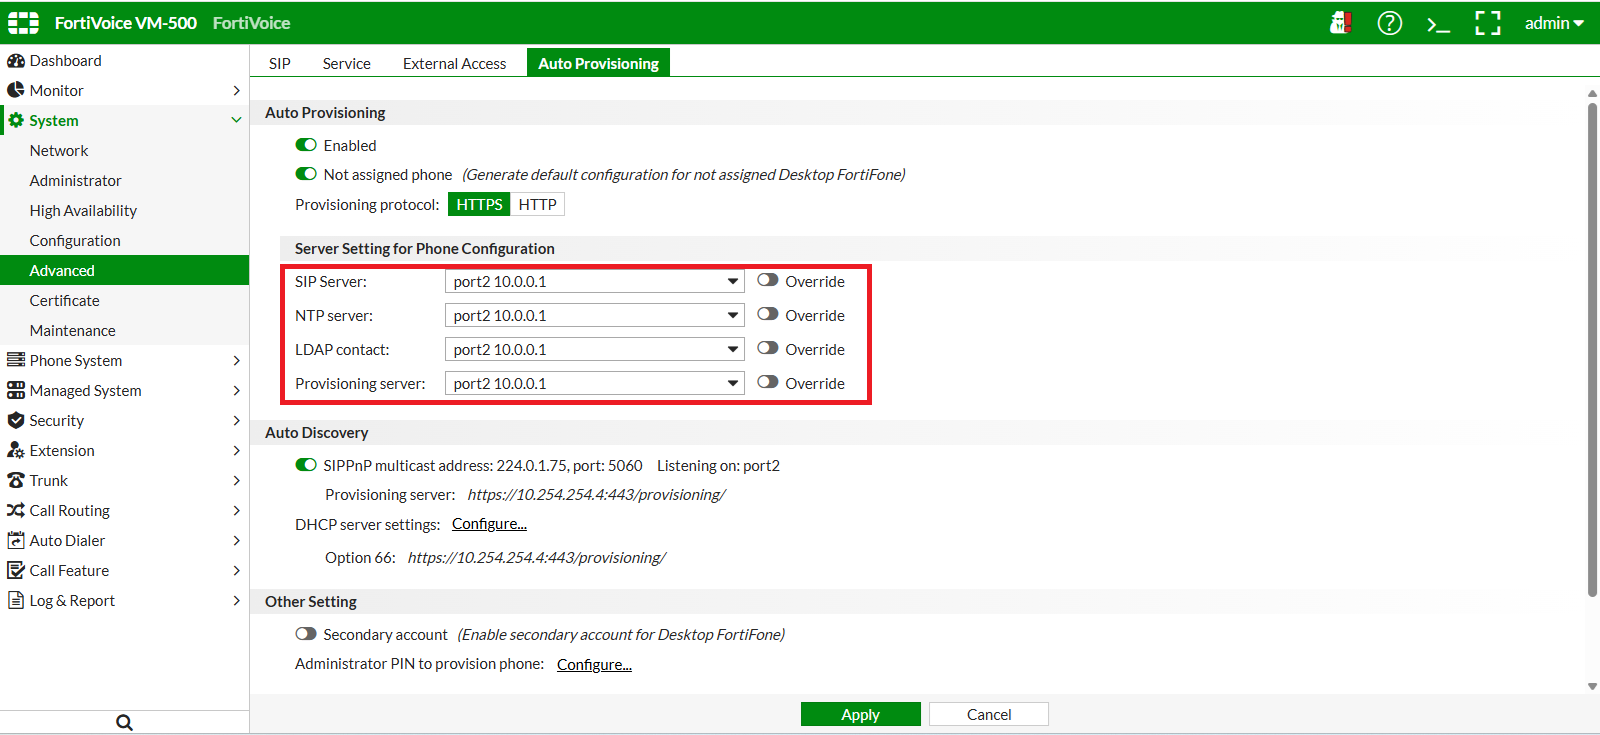
As port2 is used to connect the FortiVoice to the network, the provisioning interface used to provide configuration to FortiFones and softphone clients must be updated.
Using the FortiVoice web administration page, select System and Advanced on the left-hand menu and select the Auto Provisioning tab.
Select port2 for all entries under Server Setting for Phone Configuration.
Click the Apply button at the bottom of the page to apply the changes.